Embedding Third-party Enterprise Systems
# Embedding Third-party Applications
# Background
Modern enterprises typically maintain their own internal systems. While using Fxiaoke CRM, they also want direct access to these internal systems, which creates the need for integrating third-party applications with Fxiaoke.
This article provides best practices for embedding third-party applications.
# Sequence Diagram
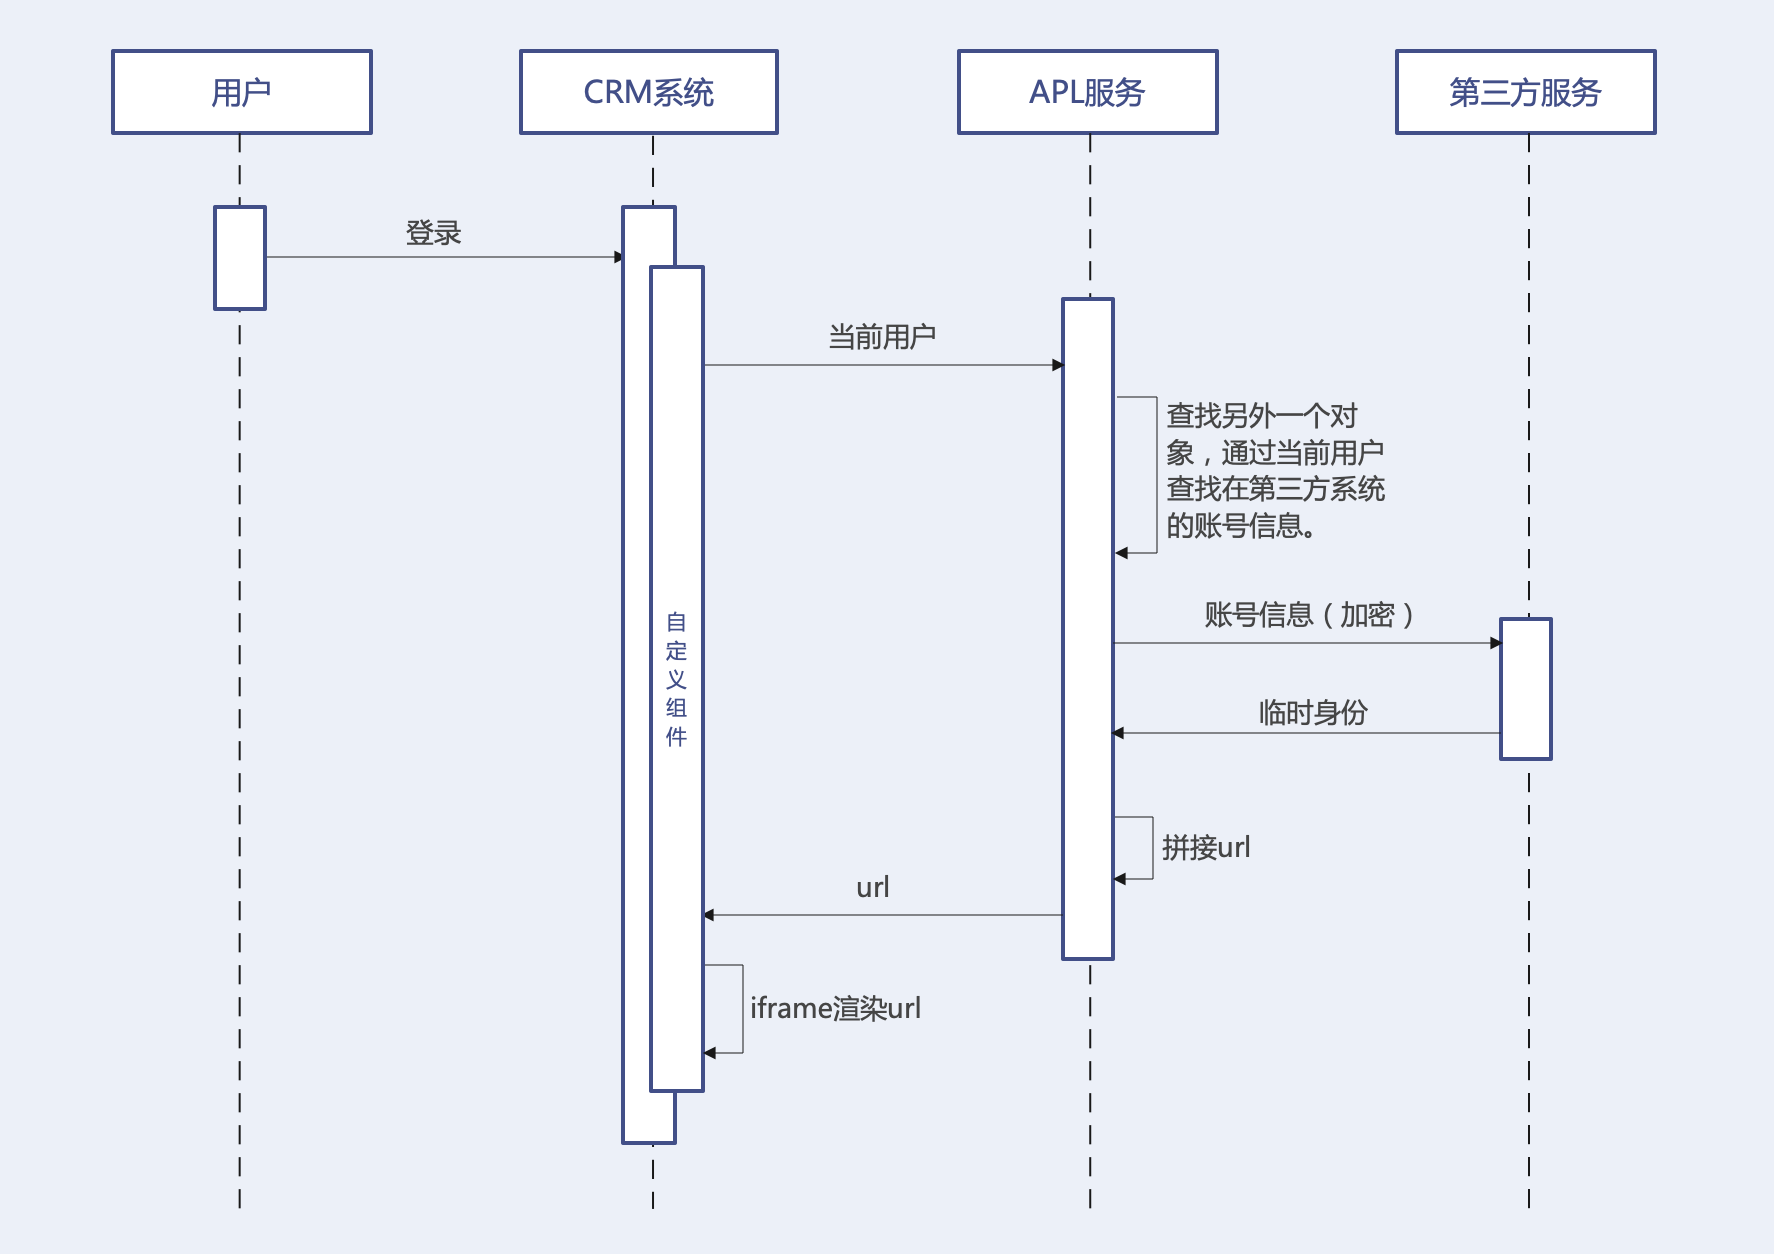
Both parties must agree on encryption rules beforehand to prevent potential security issues.
# Integration Requirements
Before development, verify that the third-party system meets the following conditions:
- Uses
HTTPSprotocol - Sets
x-frame-optionheader to eitherDENYorALLOW-FROM https://www.fxiaoke.com/ - Configures
samesiteinset-cookieasNone
iframe Usage Issues provides further explanation.
# Development Code
# APL Function
Implementation omitted...
Assume the APL function's api_name is func_nK8fQ__c.
# Template
<template>
    <div style="width: 100%;">
        <iframe name="google_ads_frame2" width="100%" height="100%" frameborder="0" :src="dUrl" marginwidth="0" marginheight="0" vspace="0" hspace="0" allowtransparency="true" scrolling="no" allowfullscreen="true"></iframe>
    </div>
</template>
# Script
Let's outline the approach:
- Call APL to obtain the third-party system's SSO URL
- Render the iframe
<script>
export default {
    data() {
        return {
            dUrl: ''
        }
    },
    created() {
        this.fetchUrl();
    },
    methods: {
        fetchUrl() {
            FxUI.userDefine.call_controller('func_nK8fQ__c').then((res) => {
                if(res.Value.success) {
                    this.dUrl = res.Value.functionResult.url;
                }
            })
        }
    }
}
</script>
Inline styles are used, so no separate style section is needed.
# Final Code
<template>
    <div style="width: 100%;">
        <iframe name="google_ads_frame2" width="100%" height="100%" frameborder="0" :src="dUrl" marginwidth="0" marginheight="0" vspace="0" hspace="0" allowtransparency="true" scrolling="no" allowfullscreen="true"></iframe>
    </div>
</template>
<script>
export default {
    data() {
        return {
            dUrl: ''
        }
    },
    created() {
        this.fetchUrl();
    },
    methods: {
        fetchUrl() {
            FxUI.userDefine.call_controller('func_nK8fQ__c').then((res) => {
                if(res.Value.success) {
                    this.dUrl = res.Value.functionResult.url;
                }
            })
        }
    }
}
</script>